Install IIS 8.5 for the first time in the Server Manager
When the Web Server (UI) role is chosen for the first time in the Add Roles and Features Wizard in Server Manager, the basic components and services needed for IIS are automatically selected. The following procedure will install Internet Information Services on a running physical server when IIS has not already been installed. To change an existing installation of IIS, perform the next procedure, Install additional role services for IIS. These two procedures involve different steps.-
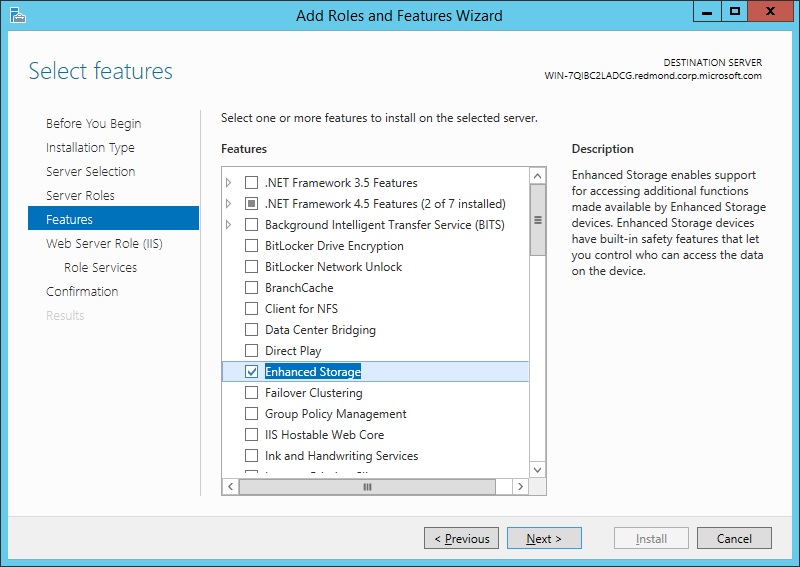
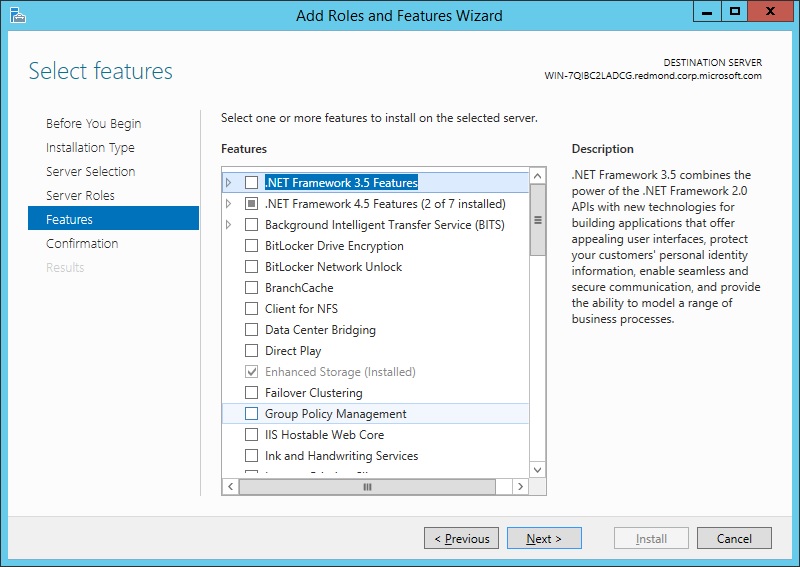
On the Features page, select any features that you would like to install, and then
click Next. Note that you do not need to select any features on this page to install IIS.
IIS setup will select the features that are required.
- Open Server Manager by clicking the Server Manager icon on the desktop.
-
In the Server Manager window, with the Dashboard and Quick Start
selected, click Add roles and features, or click the Manage menu, and
then click Add Roles and Features. The Add Roles and Features Wizard will
start with a Before You Begin page. The wizard asks for verification of the following:
- The administrator account has a strong password.
- The network settings, such as IP addresses, are configured.
- The most current security updates from Windows® Update are installed.
- On the Before You Begin page, click Next.
-
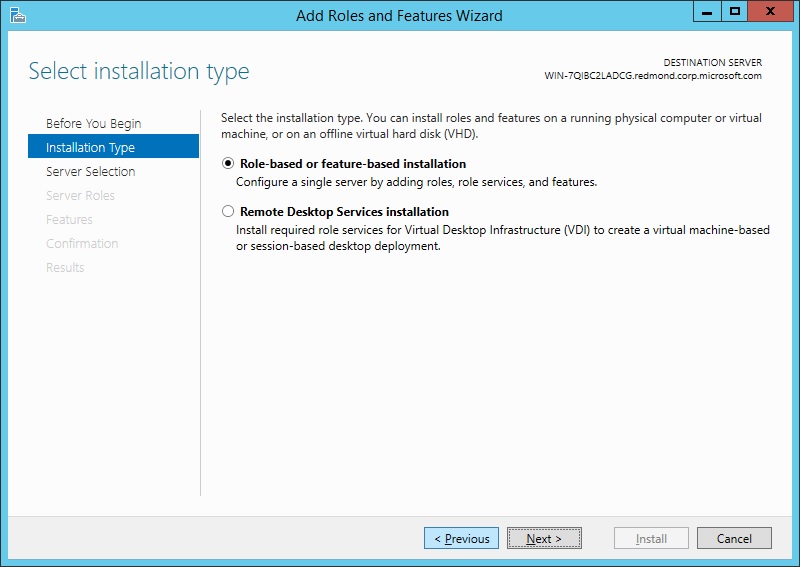
On the Installation Type page, select Role-based or feature-based installation to
configure a single server. Click Next.
-
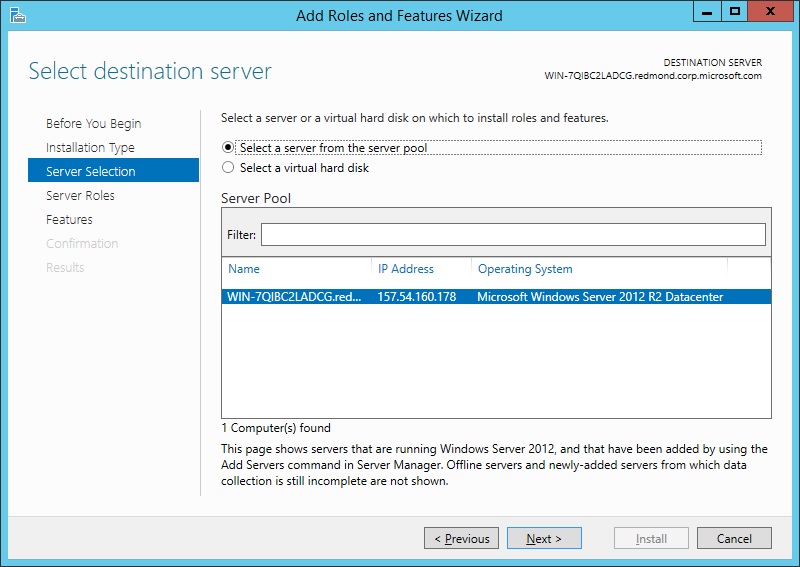
On the Server Selection page, select Select a server from the server pool, and then
select a server; or select Select a virtual hard disk server, select a server to mount
the VHD on, and then select a VHD file. Click Next.
Note: To connect to the virtual hard disk, the virtual machine must be turned off and
disconnected. If you select a VHD file from a network share, that share must grant
Read and Write permissions to the computer (local system) account of the server
that you selected to mount the VHD (user-only account access is not sufficient).
Note: Servers in a server pool will be available only if they have been added by the Add other servers to manage command in Server Manager.
-
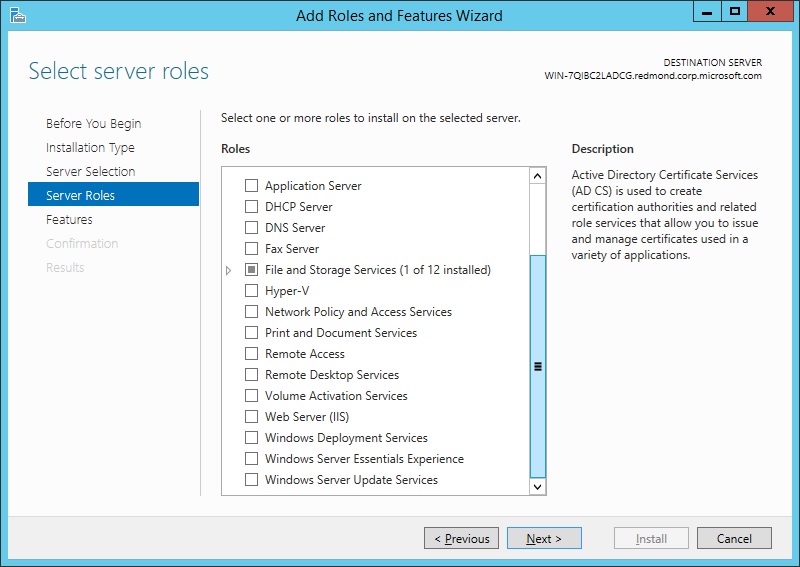
On the Server Roles page, select Web Server (IIS).
-
In the Add Roles and Features wizard, click Add Features if you want to install
the IIS Management Console. If you do not want to install the Management Console,
uncheck Include management tools (if applicable), and then click Continue.
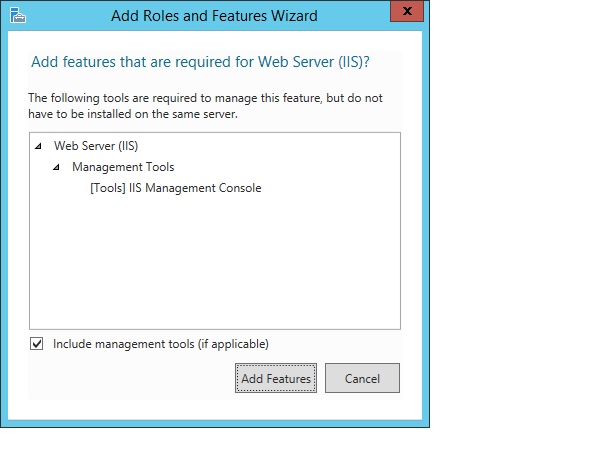
- On the Server Roles page, click Next. Note: The features required for the default role services of Management Tools and IIS Management Console will be preselected in the Features page.
- On the Web Server Role (IIS) page, click Next.
-
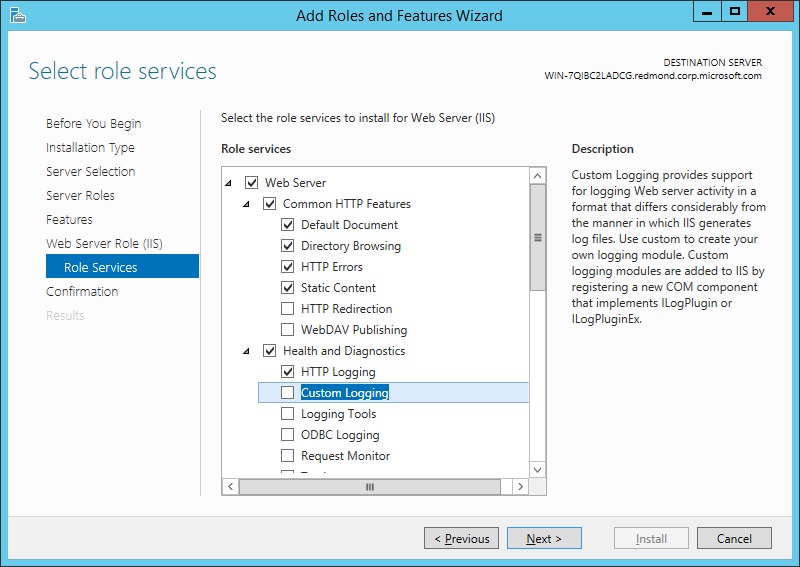
On the Role Services page, select any additional role services that you want to install.
Note: When you install IIS for the first time by selecting Web Server (IIS), you will
get at least the default installation that includes a minimum set of role services.
You can see at this point that those default services are preselected on the Server
Roles page. For a list of the server roles available, and which roles are installed
by default, see Modules in IIS 8.5. You will have the chance to select more role
services later in this procedure.
Note: You can also deselect role services that were selected by default when you selected Web Server. However, at least one role service must be selected for Web Server to be selected and installed.
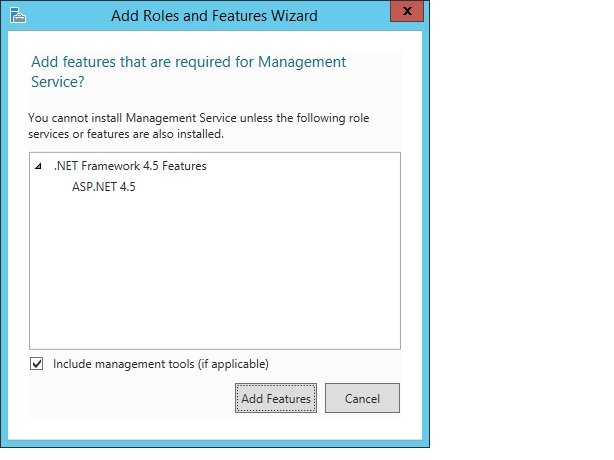
- If you selected a role service that requires other role services or features to be installed, a page will be opened indicating the role services or features to be installed. Leave Include management tools (if applicable) selected to select the install management tools associated with the server role. You may not need the management tools on the destination server if you plan to manage the role remotely. Click Add Features to add the required role services or features.
- After you have added the role services that you need on the Role Services page, click Next.
-
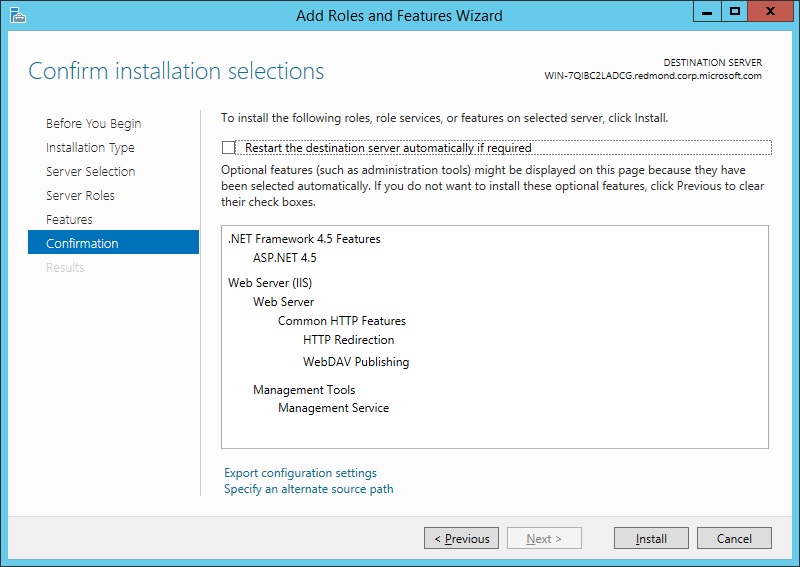
On the Confirmation page, verify the role services and features that are selected.
Select Restart the destination server automatically if required to restart the
destination server if the settings need to take immediate effect. To save the configuration
information to an XML-based file that you can use for unattended installations with Windows
PowerShell, select Export configuration settings, move to the appropriate path in the Save As
dialog box, enter a file name, and then click Save.
When you are ready to start the installation process on the Confirmation page, click Install.

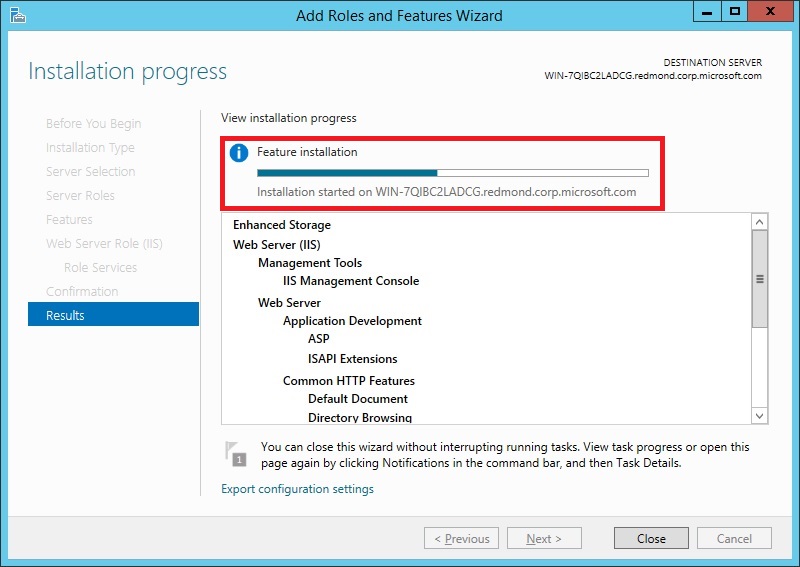
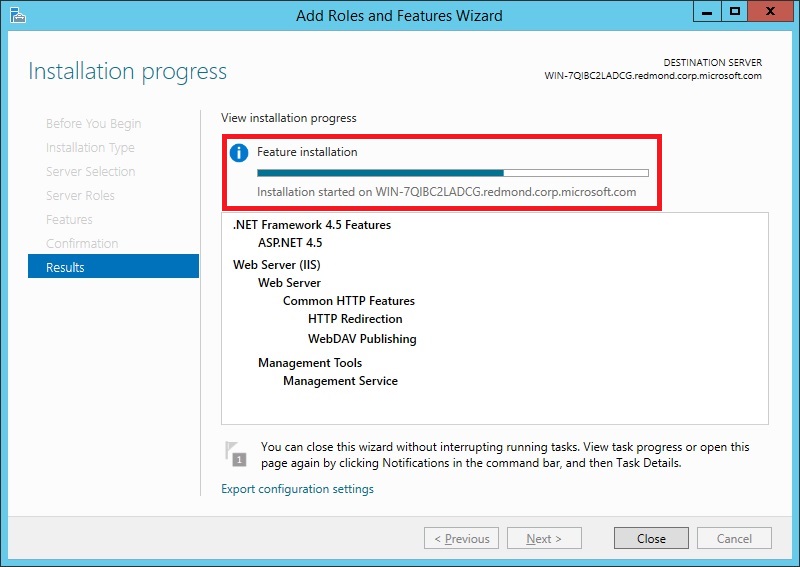
- The Installation Progress page is displayed. You can close the wizard without interrupting
running tasks. You can view task progress or open the page again by clicking Notifications
in the notification area, and then clicking Task Details.
- On the Results page, verify that the installation succeeds, and then click Close.

-
Confirm that the Web server works by opening a Web browser, and verifying that the following
default Web page is displayed when you use the http://localhost address.

Install additional IIS 8.5 role services in the Server Manager
After you have installed the Web Server role on a running physical server for the first time, you can run through the installation process again to install additional roles, role services, and features.-
On the Installation Type page, select Role-based or feature-based installation to configure
a single server. Click Next.

-
If the role service that you selected requires other role services or features to be installed,
an Add Features page will be opened listing those required role services or features. Leave Include
management tools (if applicable) selected to select the install management tools associated with
the server role. You may not need the management tools on the destination server if you plan to
manage the role remotely. Click Add Features to add the required role services or features
to the installation.
- Open Server Manager by clicking the Server Manager icon on the desktop.
-
In the Server Manager window, with the Dashboard and
Quick Start selected, click Add roles and features, or click the Manage menu, and then click
Add Roles and Features. The Add Roles and Features wizard will start with a Before You Begin
page. The wizard asks for verification of the following:
- The administrator account has a strong password.
- The network settings, such as IP addresses, are configured.
- The most current security updates from Windows® Update are installed.
- On the Before You Begin page, click Next.
-
On the Server Selection page, select Select a server from the server pool, and then select
a server; or select Select a virtual hard disk server, select the server to mount the
VHD on, and then select the VHD file. Click Next.
Note: To connect to the virtual hard disk, the virtual machine must be turned off and disconnected.
If you select a VHD file from a network share, that share must grant Read and Write permissions
to the computer (local system) account of the server that you selected to mount the VHD (user-only
account access is not sufficient).
Note: Servers in a server pool will be available only if they have been added by the Add other servers to manage command in the Server Manager.
Note: On the Server Roles page, Web Server (IIS) will be selected when IIS 8.0 has already been installed. If Web server (IIS) is not selected, perform the procedure in Install IIS 8.5 for the first time in the Server Manager.

-
On the Server Roles page, open the Web Server (IIS) tree until you see a role service that
you want to install. Select the role service.
Note: Those roles, services, and features that have already been installed will be identified
by "Installed" in parentheses after the name, and the name will be grayed out. To remove a role,
service, or feature, see Uninstall IIS 8.5 Using the Server Manager. Note, however, that you can
expand the lower-level entries under a node even when the node is grayed out.
Note: For a list of the server roles that are available, and which roles are installed by default, see Modules in IIS 8.5 below.

-
If you need any additional role services, repeat steps 6 and 7.
Note: Add only the modules that are necessary to minimize the IIS installation footprint
and the attack surface.
When you have selected all required role services, and their dependencies, on the Server Roles page, click Next.
-
On the Features page, select any features that you need to be installed. Any features required
to be installed for role services that you selected in step 6 will already be selected. Click
Next.
-
On the Confirmation page, verify the role services and features that are selected. Select
Restart the destination server automatically if required to restart the destination server
if the settings need to take immediate effect. To save the configuration information to an
XML-based file that you can use for unattended installations with Windows PowerShell, select
Export configuration settings, move to the appropriate path in the
Save As dialog box, enter
a file name, and then click Save.
When you are ready to start the installation process on the Confirmation page, click
Install.
-
The Installation Progress page is displayed. You can close the wizard without interrupting running tasks.
You can view task progress or open the page again by clicking Notifications in the notification area,
and then clicking Task Details.
-
On the Results page, verify that the installation succeeds, and then click
Close.

- Confirm that the Web server works by opening a Web browser, and verifying that the following
default Web page when you use the http://localhost address.
Uninstall IIS 8.5 using the Server Manager
In the Add Roles and Features wizard of Server Manager, you cannot delete existing features that have already been installed. To delete roles and features, use the Remove Roles and Features wizard of Server Manager. You can remove an individual role, role service, or feature by unchecking it in the wizard, or you can uninstall all of IIS by unchecking the IIS Web Server Role.- Open Server Manager by clicking the Server Manager icon on the desktop.
-
Click Manage at the top of the Server Manager, and then click Remove Roles and Features.

- On the Before you begin page, click Next.
-
On the Server Selection page, select the server from the server pool, and then click Next.

-
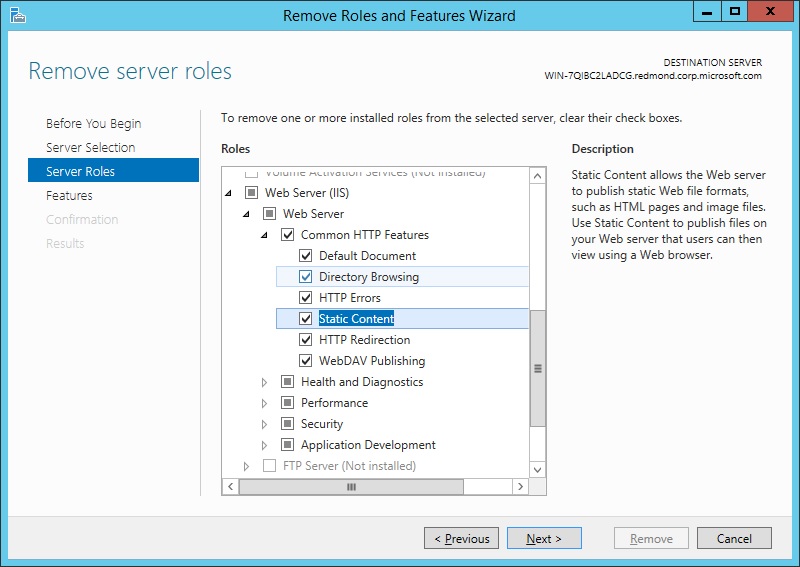
On the Remove Server Roles page, clear the check box of any server role or role service that you would like to remove.
-
If you uncheck a role service that has feature dependencies, the Remove Features dialog box
will be displayed showing the dependencies. Click Remove Features to remove them. You can remove
all of IIS by unchecking Web Server (IIS).

- On the Remove Server Roles page, select any other role or role service that you want to remove, and then click Next.
-
On the Features page, uncheck any feature that you would like to remove. If you uncheck a feature
that has feature dependencies, a dialog box will be displayed showing the dependencies.
Click Remove Features to remove them. On the Features page, click Next.

-
On the Confirmation page, verify that the roles, role services, and features to be removed are correct, and then click Remove.
Note: It is recommended that you do a restart if you are prompted to do so, unless you have other
activities that you want to do before the restart takes place. A restart is especially important when you
remove roles, role services, or features.

-
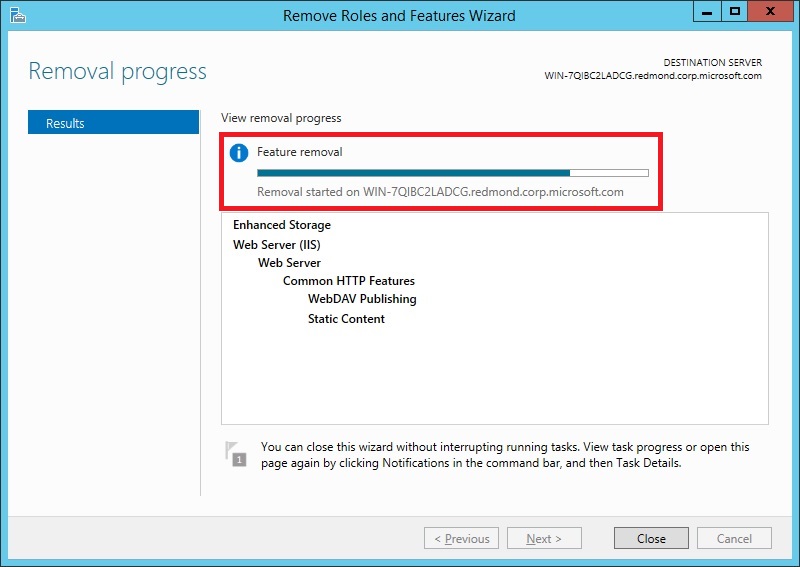
The Removal Progress page is displayed. You can close the wizard without interrupting running tasks.
You can view task progress or open the page again by clicking Notifications in the notification area,
and then clicking Task Details.
-
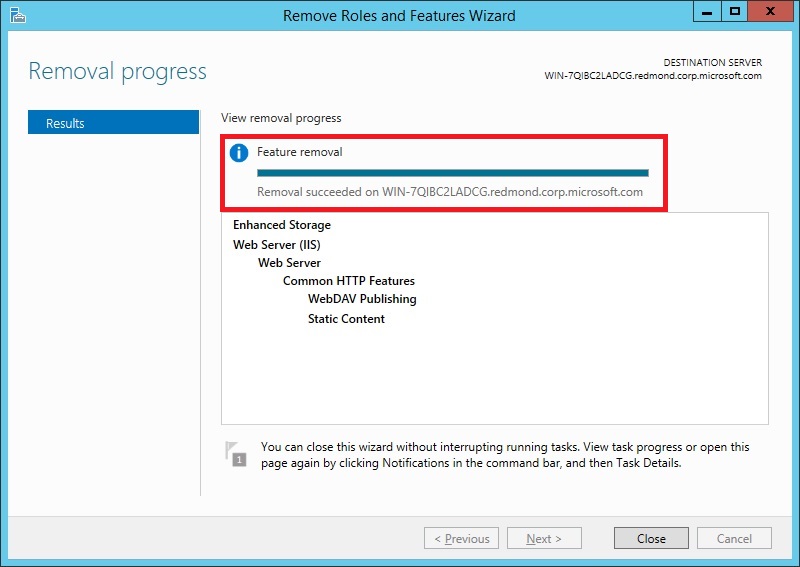
On the Results page, click Close.
- Restart the destination server to finish removing features.
Install IIS 8.5 from the Command Line
You can install IIS 8.5 from the command line using DISM or PowerShell. Note that DISM and PowerShell have different namespaces for installation parameters, so the parameter names used in their commands will be different. For more information, see Modules in IIS 8.5.Note: Pkgmgr.exe has been deprecated. Use DISM instead for scripts installing IIS 8.5.
Install IIS 8.5 using DISM
Automating the installation of IIS by using unattended scripts is very useful if you need to deploy multiple Web servers and want to ensure that each of the Web servers is set up with identical components and services. In Windows Server 2012 R2, DISM is used for unattended scripts, letting you install or uninstall optional features from a command prompt or scripts. To use DISM, you must make sure you have administrative user rights on the computer. For more information about DISM, see What is DISM?If you do not explicitly include in the DISM code a feature that the IIS installation has a dependency on, the installation will fail, and will not generate an error message. For a list of dependencies required, see Feature Dependencies.
For a full list of the DISM parameters corresponding to IIS roles, services, and features, see Modules in IIS 8.5.
The following script will install all roles, role services, and features of IIS 8.5, getting the full IIS installation that includes all available feature packages. If there are roles, role services, or features that you do not need, you should edit the script to include only those that you require. The order of the commands in the DISM script does not matter. The entire script will be handed off to the engine and treated as one transaction. To install IIS 8.5 with a script, type the following on one line in an elevated command prompt.
DISM.EXE /enable-feature /online /featureName:IIS-WebServerRole /featureName:IIS-WebServer
/featureName:IIS-CommonHttpFeatures /featureName:IIS-StaticContent /featureName:IIS-DefaultDocument
/featureName:IIS-DirectoryBrowsing /featureName:IIS-HttpErrors /featureName:IIS-HttpRedirect
/featureName:IIS-ApplicationDevelopment /featureName:IIS-ASPNET /featureName:IIS-NetFxExtensibility
/featureName:IIS-ASPNET45 /featureName:IIS-NetFxExtensibility45 /featureName:IIS-ASP /featureName:IIS-CGI
/featureName:IIS-ISAPIExtensions /featureName:IIS-ISAPIFilter /featureName:IIS-ServerSideIncludes
/featureName:IIS-HealthAndDiagnostics /featureName:IIS-HttpLogging /featureName:IIS-LoggingLibraries
/featureName:IIS-RequestMonitor /featureName:IIS-HttpTracing /featureName:IIS-CustomLogging
/featureName:IIS-ODBCLogging /featureName:IIS-Security /featureName:IIS-BasicAuthentication
/featureName:IIS-WindowsAuthentication /featureName:IIS-DigestAuthentication
/featureName:IIS-ClientCertificateMappingAuthentication /featureName:IIS-IISCertificateMappingAuthentication
/featureName:IIS-URLAuthorization /featureName:IIS-RequestFiltering /featureName:IIS-IPSecurity
/featureName:IIS-Performance /featureName:IIS-HttpCompressionStatic /featureName:IIS-HttpCompressionDynamic
/featureName:IIS-WebDAV /featureName:IIS-WebServerManagementTools /featureName:IIS-ManagementScriptingTools
/featureName:IIS-ManagementService /featureName:IIS-IIS6ManagementCompatibility /featureName:IIS-Metabase
/featureName:IIS-WMICompatibility /featureName:IIS-LegacyScripts /featureName:IIS-FTPServer /featureName:IIS-FTPSvc
/featureName:IIS-FTPExtensibility /featureName:NetFx4Extended-ASPNET45 /featureName:IIS-ApplicationInit
/featureName:IIS-WebSockets /featureName:IIS-CertProvider /featureName:IIS-ManagementConsole /featureName:IIS-LegacySnapIn
Install IIS 8.5 using PowerShell
You can use the following PowerShell cmdlets to install all of IIS 8.5:import-module servermanager add-windowsfeature web-server -includeallsubfeatureTo install only specific features, list them in the PowerShell cmdlet, as in the following example:
import-module servermanager
add-windowsfeature Web-Server, Web-WebServer, Web-Security,
Web-Filtering
The following points apply to running the PowerShell cmdlets:
- The cmdlet requires elevation. You must be running a Windows PowerShell session as an administrator to run the cmdlet.
- The cmdlet does not install management tools for roles, role services, and features by default. You must add the IncludeManagementTools parameter to the cmdlet to do so.
- Web-Server
- Web-WebServer
- Web-Security
- Web-Filtering
- Web-Cert-Auth
- Web-IP-Security
- Web-Url-Auth
- Web-Windows-Auth
- Web-Basic-Auth
- Web-Client-Auth
- Web-Digest-Auth
- Web-CertProvider
- Web-Common-Http
- Web-Http-Errors
- Web-Dir-Browsing
- Web-Static-Content
- Web-Default-Doc
- Web-Http-Redirect
- Web-DAV-Publishing
- Web-Performance
- Web-Stat-Compression
- Web-Dyn-Compression
- Web-Health
- Web-Http-Logging
- Web-ODBC-Logging
- Web-Log-Libraries
- Web-Custom-Logging
- Web-Request-Monitor
- Web-Http-Tracing
- Web-App-Dev
- Web-Net-Ext
- Web-Net-Ext45
- Web-ASP
- Web-Asp-Net
- Web-Asp-Net45
- Web-CGI
- Web-ISAPI-Ext
- Web-ISAPI-Filter
- Web-WebSockets
- Web-AppInit
- Web-Includes
- Web-Ftp-Server
- Web-Ftp-Service
- Web-Ftp-Ext
- Web-Mgmt-Tools
- Web-Mgmt-Console
- Web-Mgmt-Compat
- Web-Metabase
- Web-WMI
- Web-Lgcy-Mgmt-Console
- Web-Lgcy-Scripting
- Web-Scripting-Tools
- Web-Mgmt-Service
Uninstall IIS 8.5 using PowerShell
You can use the PowerShell cmdlet UnInstall-WindowsFeature to uninstall IIS 8.5. Run get-help Install-WindowsFeature at a PowerShell command line to see the syntax of the cmdlet. The following points apply to running the cmdlet:- The cmdlet requires elevation. You must be running a Windows PowerShell session as an administrator to run the cmdlet.
- The cmdlet does not uninstall management tools for roles, role services, and features by default. You must add the IncludeManagementTools parameter to the cmdlet to do so.
www.technetsupport.micorsoft.com
Published By
S.G.Godwin Dinesh.MCA
Sr.System Administrator
No comments:
Post a Comment